Sunday, February 27, 2011

Painting and Pillow Fail

Let me start this post by saying I'm totally frustrated at the moment.  I mentioned before that I was going to paint my dining/sewing room before all the big furniture comes back. {btw - if anyone has a good way for me to convince hubby to scrap the dining room furniture and just make this my sewing room, I'm all ears}

Our new house is over 40 years old. The room I'm in is unfortunately paneled and painted over. We have baseboard heating. I never knew that leads to dirty walls, but it does. Kinda looks like this over time.
 And this.

And yes, the brass outlet covers are going too.

 So back to my paint job. I selected a white with gray tinge because I loved a similar color that I did in our bedroom. Unfortunately it wasn't gray tinge, it was blue. The walls looked the color of wet cement. blech.  AND - I wasn't thinking and the downstairs of our house is all done in warm peachy neutrals. It's a very open floor plan so the blue was not cutting it. I went back for decorator white and here's the process of repainting. (sorry for the blown out window, it was the only way to show the blue wall)

So that was done but the trim still needed a 2nd coat of white. And the walls might too. I can't decided if I'm fixated and just seeing the blue because I'm looking for it. Or if I can really see it. Either way, I'm so annoyed that a 2/3 day job has stretched to 5.

If you are still with me - thanks! I'm done ranting. About painting. Here's what I need help with.

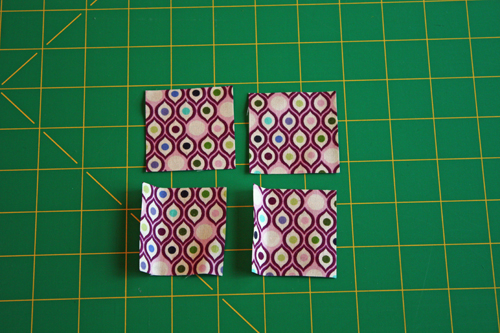
I've been sneaking in work on this pillow even though the sewing room is mostly packed up and I'm totally frustrated. This pattern is from the book Dare to Be Square by Boo Davis. I love this book, it's got some great patterns in it. And I think what's happening is totally my fault but I can't figure it out!
Here's the top in question. The blocks are assembled in rows from top to bottom. My problem is that nothing is lining up. The lines of blocks with the printed fabric were 1/2 inch longer than the solid blocks that run in between it.  I can't figure out why. I re-measured. I cut another set and put them together again with the same results. But I found someone on flickr who made it and had no problems. So it must be something I'm doing. Maybe my seams aren't a perfect 1/4 inch?
I finally got frustrated and just stretched it to fit. As you can see, the results are less than stellar. Above you can see how uneven my edges are. Below is a close up of the hot mess.
It's stretched, it's puckered and it's annoying the heck out of me. It still needs a border and a backing but I'm ready to just toss it and move on.

Have you had this happen? What did you do?  Do you think it can be saved with some creative quilting? I usually don't quilt my pillow tops, but maybe some quilting and a washing will hide this? Help!

Friday, February 25, 2011

Tutorial: Sunrise Star Pillow

When I posted this pillow in January, a couple of people mentioned they were interested in a tutorial. Since the paint is drying in my sewing room and I'm officially unable to sew, that gives me time to put the tutorial together for you.

The official name of this block is the Sunrise star and it's a pretty traditional block. I didn't design this myself so I don't know if there are any issues with me posting this. If you know of any let me know and I'll remove it!  Like I said, this a a pretty traditional block that I learned doing my first quilt. What's cool about it is the way those little "sunrays" get into the block. It's way easier than it looks. The actual block will be 12.5 inches square. I added the green border to fit the pillow I was using.

First select your fabrics.

You'll need:
A light fabric - I used Kona Ash.
a medium - I used the light blue floral.
a dark - the eyedrop fabric was what I chose. You can use all the same color or break it into different colors like I did.
Then you need your center fabric. This can be whatever value you prefer.

The first thing I did was to fussy cut the center block. You need a 5 1/2 inch square.


From your dark fabric cut (4) 2 inch squares.

 Draw a diagonal line on the back of the 2 inch squares
Place the squares on the corners of your fussy cut piece with right sides together and sew over the lines that you drew.
Cut the excess fabric so you have 1/4 inch seams.
Press the corners out and you will have a block that looks like this. Set it aside for now.

Also from your dark fabric (or coordinating dark fabric if you are using 2 colors) cut a 3 1/4 inch square and then slice it in half diagonally both ways so you have quarter square triangles.

 Take your light fabric and cut (4) 4" squares. Set aside for now.

Also cut a 6 1/4" square and cut it diagonally both ways for quarter square triangles.


 Using your medium fabric, cut (4) 4 3/8" squares.
Cut them in half.
On the long side of the triangle, measure to 4 3/8" and cut the tip off.

Line up the light triangle to this shape and sew them together. Press towards the cut off triangle. Make 4 of these.
Line up your dark with the cut off shape so that it creates a triangle. There will be some overhang from the dark fabric. Sew them together, press towards the cut off shape. Make another 4 of these units.
This is what your two finished pieces should look like.
Put them together this way and sew. You'll have 4 of these units.
 On two of those pieces sew the light squares on each side. You will have two of the above piece and two of the bottom piece.
Attach the two small pieces to the center piece so it looks like this.
Attach your pieces with the gray squares and you have your finished block!
Add a border if needed to fit your pillow and finish the back as you like.  I didn't take photos if it this time, but I did an envelope closure. I did directions on this type of back  on this post. Hope you like it!

Wednesday, February 23, 2011

Work in Progress Wednesday {15}

Okay, I feel like I've been getting a lot of fabric and nothing is getting done with it. Case in point, the above photo is about 8 yards of fabric. Gasp right!  These are for my kitchen curtains. One of the windows is about 6 feet long so really, it's not crazy to need so much. I'm just glad I don't do the stash report!
For those of you familiar with the above fabrics, yes, they have been reprinted. Those are Amy Butler Lotus prints and you can find them at Hawthorne Threads. I was really excited when I saw they've been reprinted because I've been looking for a cool red print for my kitchen curtains.


The one WIP I did manage to get completed this week was my bathroom curtains. You can see them here.


I've been doing a lot of work on my Make Mine Modern Swap, which I posted about on Monday.


This is a sneak peek at my monochromatic challenge. I'm totally using a lot of white. I'm hoping to create a certain effect with the colors. But to be honest I've been looking at this quilt way too much and I'm sick of it and not even sure I like it anymore. It needs to go away for a week or so so I can see it fresh again. Does that happen to you? What do you do to refresh yourself?


I am binding and binding and binding the King Size quilt (still unnamed).


I started a pillow to go with it. That's my favorite block with the masked woman peeking out.

And I've realized why I do better if I just work on one project at a time. I really don't like piecing backings and quilting. So now I'm beginning to get a pile of quilt tops waiting for me while I work on the parts of my projects that I do like! Any tips on growing to like those parts of quilting that just aren't as fun for you?

Holding pattern:
Postage stamp - backing/quilting needed
Samantha's quilt - piecing
Great room curtains

Total WIP: 8

I'm also feeling like I'll never get the sewing room painted. So I'm shutting down the sewing and getting it done. I've decided on a neutral for the wall. I had lots of color in the old house and felt like I was limited with fabrics. Here I'm going with almost white so I can change out linens and decorations more to change the look. Because let's face it, painting is a total PITA and playing with fabrics is more fun! So today I'm going to clean up the room and start prepping the walls. Wish me luck!

Forgot to mention - Go see what every one else is working on over at Freshly Pieced.

Monday, February 21, 2011

Make Mine Modern Swappers

I've been focusing on getting my Make Mine Modern Swap completed. I put together this pin cushion organizer for my partner. I really love this pattern from Oh Fransson!.  They seem to be pretty popular in this swap, so hopefully I'll get one! My partner loves Parisville so I used the sprout colorway for her.
I've also got a little mystery project going for her. She asked for something a little out of the ordinary so I don't want to photograph it being used because I think she'll know it's for her. Actually, this thing was something I had to make my own pattern up for. I'm wishing I had taken tutorial photographs now!  whoops.

I have one other little project in mind for her that I can probably also get done this week. Then I need to put together the fabrics her and I'll be done. I had forgotten though that we are supposed to hold off on Mailing these until April! Guess I got ahead of myself.  And I probably won't be able to show you what the mystery item is until then just in case she reads my blog. Any guesses as to what it is?

Friday, February 18, 2011

Curtain battle #1

I decided to tackle my master bathroom curtains first. The window previously looked like this.

EEEKKK! Right?  This had to go right away. Not to mention, that fabric was some kind of awful shiny slippery fabric that really skeeved me out!

It's a nice small window so I figured I could handle it no problem without a pattern. The idea was to hang two panels. Simple right?  Things I've learned:  Measure, measure and measure again. Then - measure again. Oh, and make sure your curtain rod is hung before you measure.

I didn't know how to estimate fabric so I guessed. I guessed wrong. Once I cut into it, I knew I didn't have enough for two panels. Thankfully it seems one panel is big enough. Here's my end result.

Amazingly the length is okay and the width works.  Pure luck.
I think two panels would have been too much fabric. It's a little darker than I expected. That's the problem with ordering over the internet and not seeing it in person. So it doesn't let as much light through as I'd like. So I'm still considering cutting it and making it a valance and just hanging sheers underneath.

What do you think? Either way - this is good enough for now while I get other house projects done.

I've since found this website to estimate curtain fabric. I'm hoping it worked because I just ordered some kitchen curtain fabric too. Seriously, I'm swimming in curtain fabric.


Oh, and just a little PSA - don't let your teenager paint your house. I'm assuming this is what happened here. There is paint all over the trim and the ceiling throughout the bathroom. Nails were painted over and fixtures on the wall were not removed. ugh.


So, we'll add that to the "to-do" list also! I'm getting to be a good house painter. Guess it's a skill I can fall back on if I need a job.

Wednesday, February 16, 2011

WIP Wednesday {14}

I have a "sort of" finish this week! My bathroom curtains are finished. But I'm waiting for hubby to hang the curtain rod for them. And I'm not 100% sure about them but more on that in another post.


I've been busy making binding for the king size quilt. I was so excited when Julie over at Jaybird Quilts posted a tutorial for continuous cut bias binding. I had no idea you could do bias binding this way. There was no waste and no sewing a million little pieces together. Since this binding required almost a whole yard of fabric I was sweating as I tried this for the first time, but it worked wonderfully. I will definitely be using this method in the future. Now I need to attach all this binding...


I got the binding and backing for my postage stamp quilt. Now I just need to do something with it. That backing fabric was hard to find. Looks like Central Park is going quick. I took two small pieces since I couldn't find anyone with one big piece for me.


After everyone's recommendations I got the Fons and Porter design wall (with my coupon of course) and some Contact hooks to hang it. I love it so far. Hubby wasn't thrilled to see it hanging in the dining room but since that's my sewing room now, where else would it go?  I've got my monochromatic quilt up there right now. I did go back to my original color scheme. But I guess I shouldn't show it since I'm probably going to enter it in the Modern Quilt Guild Challenge. Are you joining?

In holding pattern:
Make Mine Modern Swap - waiting for fabric
Great Room Curtains
Samantha's Quilt
Painting my sewing/dining room

Only 8 WIP this week!

My question this week - who wants to come hang curtain rods for me? I have about 5 to go up and I have no idea how to do it!

Head over to Freshly Pieced to see what everyone else is working on.

Sunday, February 13, 2011

please allow me to gush

After stalking my driveway for the mailman, my quilt returned back to me on Wednesday.

I'm speechless about the quilting. It is stunning. I had thought I wanted simple quilting on this, but Margaret at Mainely Quilts of Love convinced me to go more fancy. I'm SO glad I listened to her. If you know the Parisville line (which is on the front of the quilt), her quilting mimics it perfectly! Here are some shots of the back of the quilt where you can see her work best.

That's the width of the quilt.

More detailed.  Look at those clamshells!! Remind you of this?

Here's a closer view of her scallops. Can you tell I love them!?


Then this is the detailing that goes on top of my piecing on the front.


I'm so thrilled with the work she did on this. Now to start putting together a mile of binding. Anyone want to bind this for me? ;)

LinkWithin

Related Posts Plugin for WordPress, Blogger...